
Wheels · Free in the app
How to Draw a Car
An easy step-by-step drawing for kids and beginners: 12 steps, about 3 minutes, on paper.
- 12steps
- 3 minabout
- Colorat the end

Quick answer
Draw a car in 12 steps: draw the trunk, draw the roof, draw the hood, then carry on one line at a time and color it in. It takes about 3 minutes with a pencil or a pen.
- Steps: 12
- Time: about 3 minutes
- You need: paper, a pencil or a pen, something to color with
- From: the Wheels path in Paper Coach
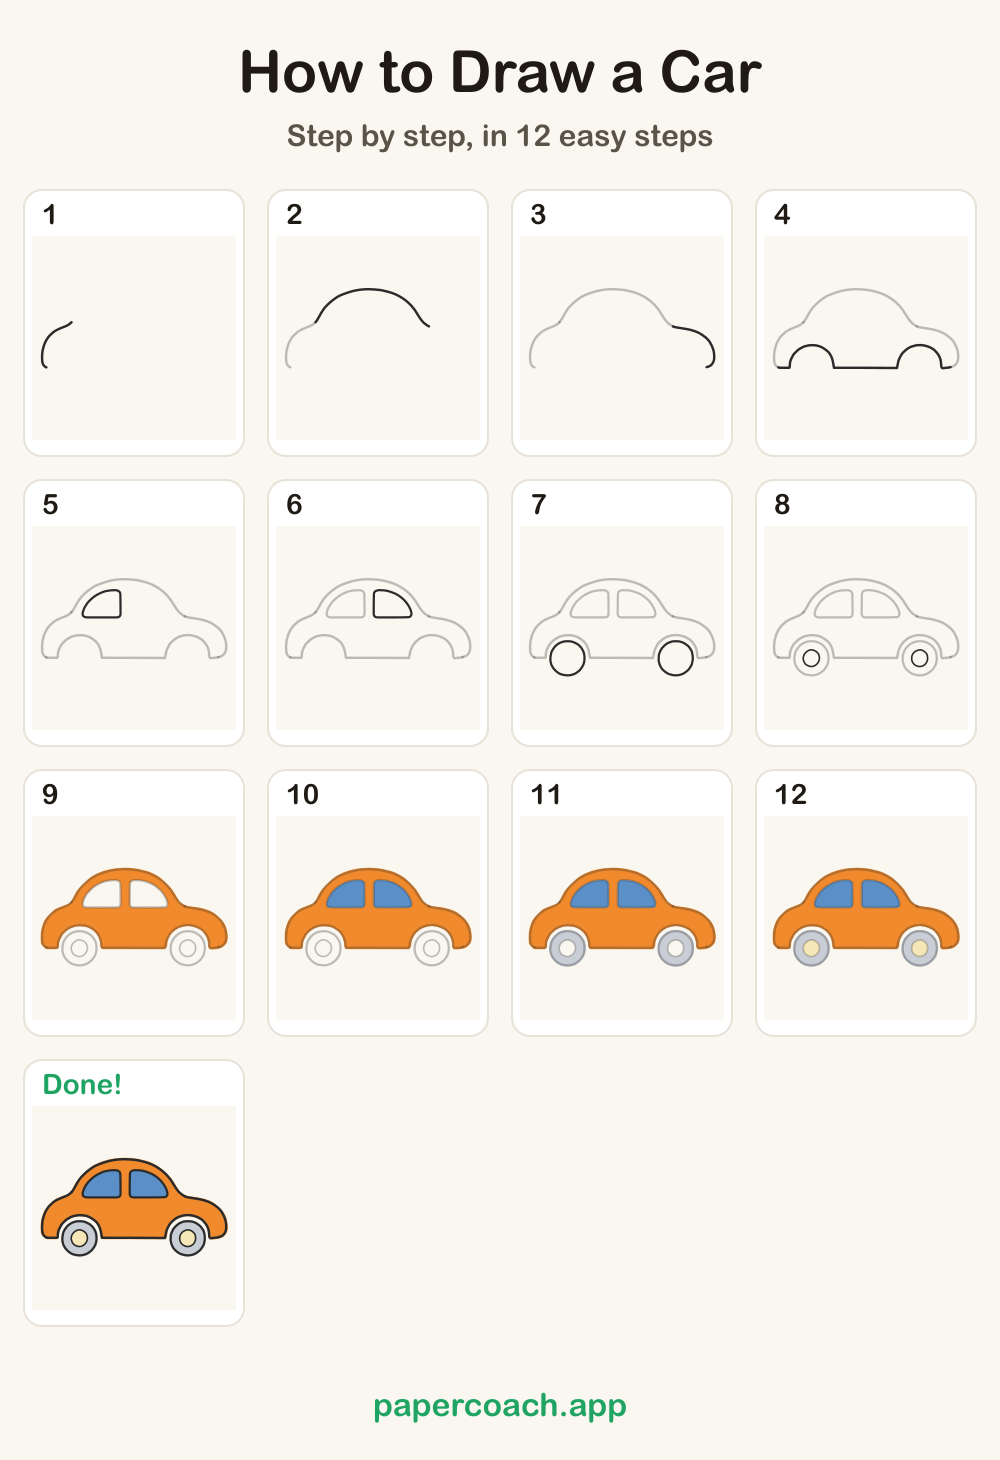
This car starts as one line of three bumps: a small one for the trunk, a tall dome for the roof, and another small one for the hood. A flat floor with two arches closes the shape. Then you tuck two windows under the roof and set a round tire in each arch.
Step by step
Draw it in 12 steps
Each picture shows the lines so far: the faded ones are done, the dark ones are this step’s.
1Draw the trunk

The back of the car is a low bump. From the bottom left, curve up and over to the dip.
2Draw the roof
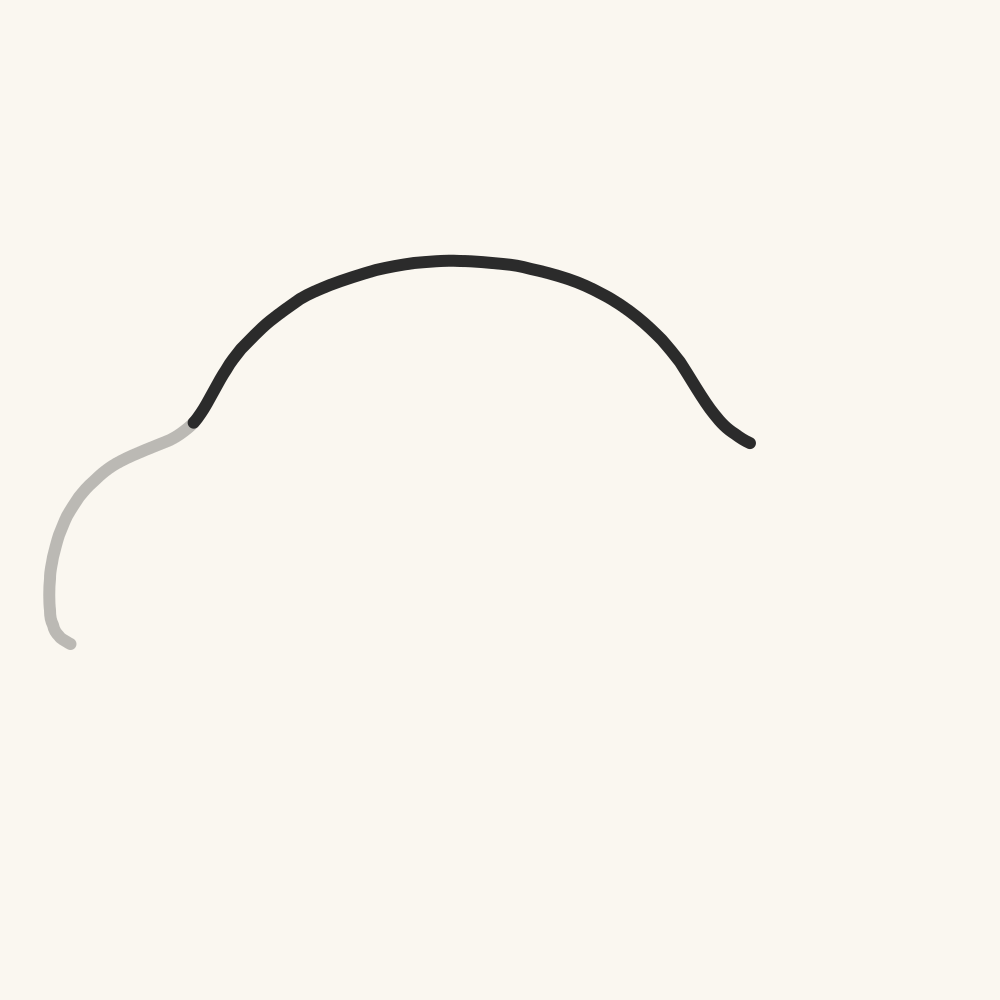
Next, the roof. It's a big dome from this dip to the next one, like a hill.
3Draw the hood
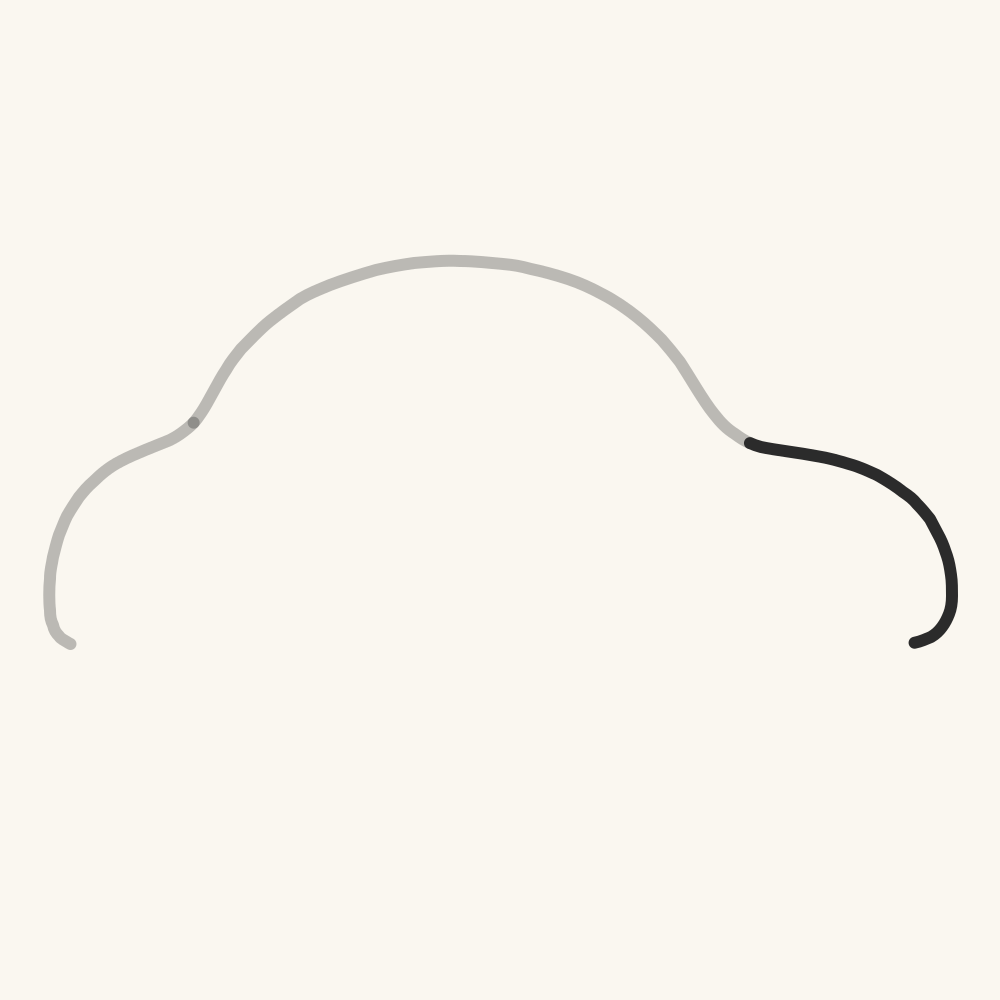
One more bump makes the hood. Curve over and down to the bottom right.
4Draw the floor

Close the car underneath. Go straight along, with an arch over each wheel.
5Draw the back window

The back window fits under the dome. It's straight below and beside, curved on top.
6Draw the front window

The front window is its mirror, across a strip of orange.
7Draw the tires

A tire sits inside each arch without touching it. Draw both circles.
8Draw the hubs

Each tire needs a small circle inside, the hub.
9Color the car

Color the car orange.
10Color the windows

Color the windows blue.
11Color the tires

Color the tires gray.
12Color the hubs

Color the hubs cream.
Tips
Draw a car well
Tips for drawing a car
- Make the roof dome about twice as tall as the trunk and hood bumps. That height difference is what makes the outline read as a car.
- Keep the trunk and hood bumps about the same size, so the car looks balanced from back to front.
- Draw the two wheel arches about the same width and space them evenly, one under the trunk side and one under the hood side.
- Leave a thin gap between each tire and its arch. A sliver of space all the way around keeps the wheels from looking stuck to the body.
- Put each hub right in the middle of its tire and keep it small, about a third as wide as the tire.
Common mistakes
- The roof dome comes out flat and low, about the same height as the hood. Lift the dome well above both side bumps, like a hill between two small mounds, before you move on to the floor.
- The two windows touch in the middle, so the roof has no support. Leave a strip between them about as wide as one finger. That strip of orange separates the back window from the front one.
- The tires are drawn bigger than the arches and poke through the body. Draw each circle a little smaller than its arch, so it fits inside with a small gap all around.
Make it your own
- Color the body any color you like instead of orange, such as red, green or yellow, and keep the windows blue so they still stand out.
- Make the roof dome taller and rounder for a cute, bubbly car, or lower and longer for a sleek one.
- Draw a second car behind the first, a little smaller and higher on the page, so they look like they are driving in a line.
- Add a simple ground line under the tires so the car sits on a road.
Done
Your finished car
Color it in as you like: the colors here are only a start.
Print it
All the steps on one page
Save it, pin it or print it, and draw from the paper.
 How to Draw a Rocket
 How to Draw a Sun
 How to Draw a Sailboat
 How to Draw an Apple
Questions
Good to know
How do I make the car look rounded instead of boxy?
Draw the whole top edge as curves with no corners. The trunk, roof and hood are three soft bumps that flow into each other, so only the floor stays straight.
Why does my car look like it is floating?
The tires probably sit too high in the arches. Let the bottom of each circle reach a little below the floor line so the car rests on its wheels.
Which way is my car facing?
The hood bump is the front. In this drawing the trunk is on the left and the hood is on the right, so the car faces right.
How do I get the two windows to match?
Draw the back window first, then copy it flipped for the front. Both have a straight bottom, a straight side by the middle strip and a curved top.
How long does it take to draw a car?
About 3 minutes for the lines, and a few more to color it in.
Can kids follow this guide?
Yes, children from about six can follow it on their own, and younger ones with a grown-up beside them.
What do I need?
Paper and a pencil or a pen, and crayons, markers or colored pencils for the colors. An eraser helps but isn’t needed.
Updated 2026-10-24

Draw it with Lina
Paper Coach shows each line of a car being drawn, then waits while you draw it. This lesson is one of the free ones. 10 lessons on the Wheels path, and more on every path.
Get Paper Coach on the App StoreFree to download · iPhone and iPad
 On a computer? Scan this with your iPhone or iPad camera to open Paper Coach in the App Store.